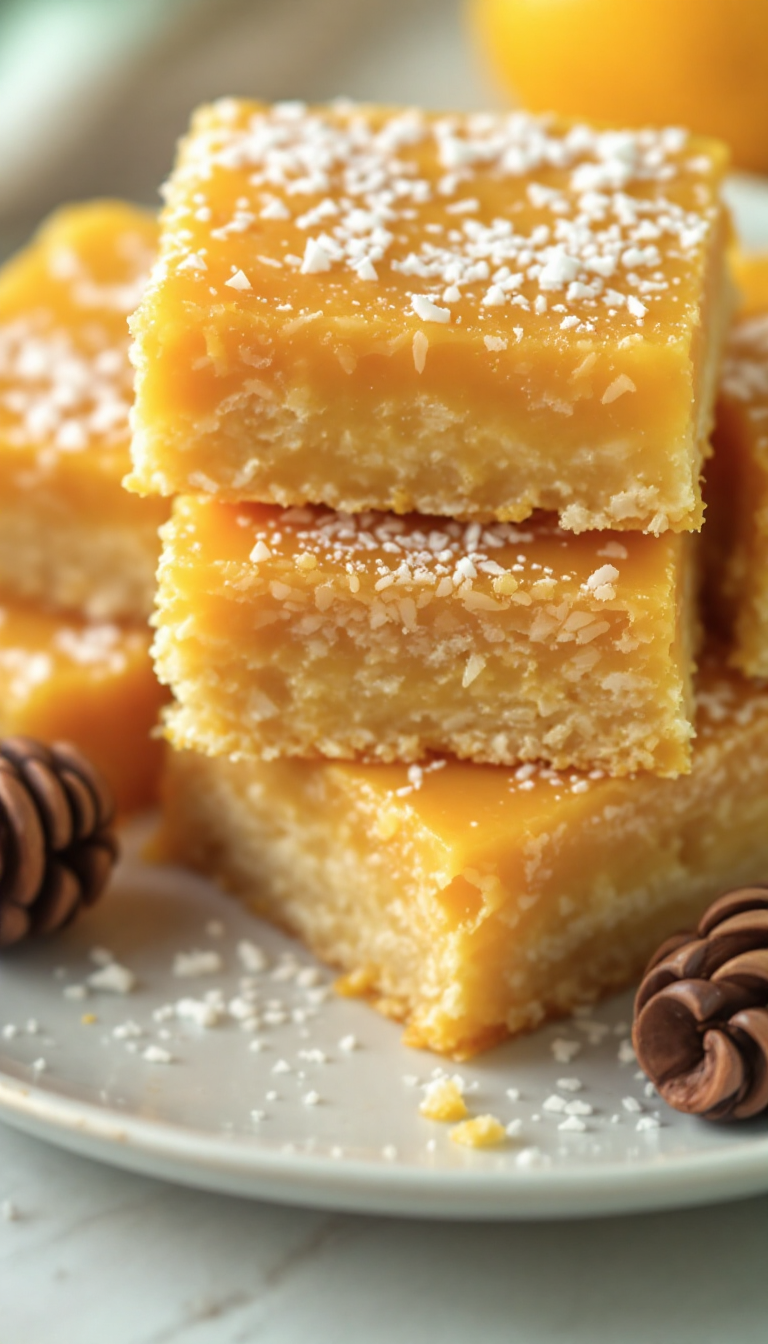
These Honey Lemon Bars are like a burst of sunshine on a plate—bright, tangy, and just sweet enough to make you smile. You know, I first stumbled upon this recipe during one of those endless Pinterest scrolls late at night, and it was love at first bite. Imagine the zing of fresh lemon mingling with the subtle sweetness of honey, all wrapped up in a delicate, flaky crust that practically melts in your mouth—what more could you want?
Steps
- Preheat the oven to 350°F. Lightly coat an 8-inch square glass or ceramic baking dish with baking spray. Create a parchment sling by cutting two 15 x 15-inch sheets of parchment paper, folding them in half, and lining the pan perpendicular to each other.
- In a food processor, blend both types of flour, brown sugar, cornstarch, lemon zest, baking powder, and salt until thoroughly mixed. Add in the butter and yogurt, pulsing until combined, then press the mixture evenly into the prepared dish, ensuring it extends up the sides slightly.
- Bake the crust for about 30 minutes until it is evenly browned. Turn off the oven and let the crust cool on a metal rack for at least 20 minutes.
- Reheat the oven to 325°F. In a medium bowl, whisk together the eggs, honey, and lemon zest until well combined. Gradually add the flour and salt, mixing until smooth, then stir in the lemon juice.
- Pour the lemon mixture over the cooled crust and bake for 22 to 25 minutes until the filling is set. Allow the bars to cool completely in the pan.
- Once cooled, use the parchment sling to lift the bars out of the pan. For the best texture, refrigerate the bars overnight to firm up the topping.
- When ready to serve, cut the bars into 12 squares with a hot, clean knife, wiping the blade between cuts. Dust with powdered sugar just before serving to complete the dish.

Ingredients
- 6 tablespoons white whole wheat flour
- 6 tablespoons all-purpose flour
- 1/4 cup light brown sugar, not packed
- 3 tablespoons cornstarch
- 2 teaspoons grated lemon zest
- 1/2 teaspoon baking powder
- 1/4 teaspoon kosher salt
- 4 tablespoons unsalted butter, cut into bits and chilled
- 1 tablespoon 0% Greek yogurt
- 1/3 cup honey
- 3 large eggs, lightly beaten
- 2 tablespoons white whole wheat flour
- 1/8 teaspoon kosher salt
- 1 teaspoon grated lemon zest
- 5 tablespoons fresh lemon juice
- 1 tablespoon powdered sugar, for dusting on top
Nutritional Values
Calories: 1620 kcal | Carbohydrates: 252 g | Protein: 36 g | Fat: 60 g | Saturated Fat: 36 g | Cholesterol: 684 mg | Sodium: 912 mg | Fiber: 6 g | Sugar: 144 g
FAQ
- Can I use a metal baking pan instead of a glass or ceramic dish for these lemon bars?
- It’s recommended to use a glass or ceramic baking dish to avoid any metallic taste in the lemon bars. These materials help maintain the flavor integrity of the ingredients.
- Why does the recipe suggest using a parchment paper sling?
- Creating a sling with parchment paper allows you to easily remove the lemon bars from the pan once they are baked. This step is crucial for maintaining the shape of the bars and making them easier to cut.
- Is it necessary to chill the bars overnight before serving?
- While not strictly necessary, refrigerating the bars overnight results in a firmer topping, enhancing the texture and making them easier to slice cleanly.
- Can I substitute the honey with another sweetener?
- Honey provides a unique flavor and natural sweetness to the bars. While you can experiment with other sweeteners, note that the flavor and color of the bars might differ from the original recipe.
- How should I store the leftover lemon bars?
- Store any leftover bars in an airtight container in the refrigerator to maintain freshness. They can be enjoyed for several days after baking.
Tips
- Choose the Right Baking Dish: Opt for a glass or ceramic baking dish to avoid any metallic taste in your lemon bars.
- Create a Parchment Paper Sling: Line your baking pan with two long sheets of parchment paper placed perpendicular to each other. This will help you lift the bars out easily once they are baked.
- Elevate the Crust Edges: When pressing the crust mixture into the pan, raise the edges about 1/4 inch to prevent the filling from spilling over.
- Use a Clean Hot Knife for Slicing: For neat slices, clean your knife between cuts and ensure it is hot for a smooth cutting experience.
Equipment
- Glass or Ceramic Baking Dish – An 8-inch square glass or ceramic baking dish is recommended to avoid a metallic taste.
- Food Processor – Used to combine the ingredients for the crust efficiently.
- Parchment Paper – Essential for creating a sling to easily remove the bars from the baking dish.